Documentation
GoJS 入门实战
从引入方式、画布初始化到节点模板与数据绑定,一份可直接上手的 GoJS 流程图开发笔记。
本页目录
GoJS
文件引用
<script src="gojs/go-debug_ok.js"></script>
可以用cdn上面的最新版本,也可以引用本地down下来的文件。
或者使用 npm 下载到项目中,引入使用import go, { ChangedEvent } from "gojs"
创建画布
随便定义一个html元素,作为我们的画布
<div id="myDiagramDiv" style="margin:auto;width:300px; height:300px; background-color:#ddd;"></div>
然后使用gojs的api初始化画布
// 创建画布
var objGo = go.GraphObject.make;
var myDiagram = objGo(go.Diagram, "myDiagramDiv", {
  //模型图的中心位置所在坐标
  initialContentAlignment: go.Spot.Center,

  //允许用户操作图表的时候使用Ctrl-Z撤销和Ctrl-Y重做快捷键
  "undoManager.isEnabled": true,

  //不运行用户改变图表的规模
  allowZoom: false,

  //画布上面是否出现网格
  "grid.visible": true,

  //允许在画布上面双击的时候创建节点
  "clickCreatingTool.archetypeNodeData": { text: "Node" },

  //允许使用ctrl+c、ctrl+v复制粘贴
  "commandHandler.copiesTree": true,

  //允许使用delete键删除节点
  "commandHandler.deletesTree": true,

  // dragging for both move and copy
  "draggingTool.dragsTree": true,
});
this.diagram = $(go.Diagram, "chart-diagram",
{
    // 画布初始位置
    initialContentAlignment: go.Spot.LeftSide, // 居中显示
    "undoManager.isEnabled": true, // 支持 Ctrl-Z 和 Ctrl-Y 操作
    // 初始坐标
    // initialPosition: new go.Point(0, 0),
    //allowSelect:false,  ///禁止选中
    // "toolManager.hoverDelay": 100, //tooltip提示显示延时
    // "toolManager.toolTipDuration": 10000, //tooltip持续显示时间
    //  isReadOnly:true,//只读

    //禁止水平拖动画布
    //禁止水平滚动条
    allowHorizontalScroll: false,
    // 禁止垂直拖动画布
    //禁止垂直滚动条
    allowVerticalScroll: false,
    allowZoom: true,//画布是否可以缩放
    "grid.visible": false, //显示网格
    // allowMove: true, //允许拖动
    // allowDragOut:true,
    allowDelete: true,//禁止删除节点
    allowCopy: true,//禁止复制
    // 禁止撤销和重做
    // "undoManager.isEnabled": false,
    // 画布比例
    // scale:1.5,
    // minScale:1.2,//画布最小比例
    // maxScale:2.0,//画布最大比例
    // 画布初始化动画时间
    // "animationManager.duration": 600,
    // 禁止画布初始化动画
    "animationManager.isEnabled": false,
    // autoScale:go.Diagram.Uniform,//自适应

    // autoScale:go.Diagram.UniformToFill,//自适应
    //    "draggingTool.dragsLink": false,//拖动线
    // autoScale:go.Diagram.None,//默认值不自适应
    // 画布边距padding
    // padding:80或者new go.Margin(2, 0)或new go.Margin(1, 0, 0, 1)
    // validCycle: go.Diagram.CycleDestinationTree,//只允许有一个父节点
    //节点模块动画  S
    // "animationManager.initialAnimationStyle":go.Animation.EaseOutExpo,
    // "animationManager.initialAnimationStyle": go.Animation.EaseInOutQuad,
    "animationManager.initialAnimationStyle": go.AnimationManager.None,
    // "animationManager.initialAnimationStyle":go.AnimationManager.AnimateLocations,
    //节点模块动画   D
    // validCycle: go.Diagram.CycleNotUndirected,

    // validCycle: go.Diagram.CycleNotDirected,
    // validCycle: go.Diagram.CycleSourceTree,
    //ismodelfied:true //禁止拖拽
    // 禁止鼠标拖动区域选中
    // "dragSelectingTool.isEnabled" : false,
    //允许使用delete键删除模块
    "commandHandler.deletesTree": true,
    // "hasHorizontalScrollbar":false,//去除水平滚动条
    // "hasVerticalScrollbar":false,//去除竖直滚动条
    // "canStart":false,
    // allowClipboard: true,
    // "toolManager.mouseWheelBehavior": go.ToolManager.WheelZoom, //有鼠标滚轮事件放大和缩小,而不是向上和向下滚动
    // layout: $(go.TreeLayout,
    //  { angle: 90, layerSpacing: 80 }),
}
);
官方文档:
var $ = go.GraphObject.make;
var myDiagram =
$(go.Diagram, "myDiagramDiv",
{
"undoManager.isEnabled": true // enable Ctrl-Z to undo and Ctrl-Y to redo
});
// define a simple Node template
myDiagram.nodeTemplate =
$(go.Node, "Horizontal",
// the entire node will have a light-blue background
{ background: "#44CCFF" },
$(go.Picture,
// Pictures should normally have an explicit width and height.
// This picture has a red background, only visible when there is no source set
// or when the image is partially transparent.
{ margin: 10, width: 50, height: 50, background: "red" },
// Picture.source is data bound to the "source" attribute of the model data
new go.Binding("source")),
$(go.TextBlock,
"Default Text",  // the initial value for TextBlock.text
// some room around the text, a larger font, and a white stroke:
{ margin: 12, stroke: "white", font: "bold 16px sans-serif" },
// TextBlock.text is data bound to the "name" attribute of the model data
new go.Binding("text", "name"))
);
var model = $(go.Model);
model.nodeDataArray =
[ // note that each node data object holds whatever properties it needs;
// for this app we add the "name" and "source" properties
{ name: "Don Meow", source: "/images/learn/cat1.png" },
{ name: "Copricat", source: "/images/learn/cat2.png" },
{ name: "Demeter",  source: "/images/learn/cat3.png" },
{ /* Empty node data */  }
];
myDiagram.model = model;
创建模型数据
- 在
model中添加模型节点数据
var myModel = objGo(go.Model);//创建Model对象
// model中的数据每一个js对象都代表着一个相应的模型图中的元素
myModel.nodeDataArray = [
    { key: "工厂" },
    { key: "车间" },
    { key: "工人" },
    { key: "岗位" },
];
myDiagram.model = myModel; //将模型数据绑定到画布图上
创建节点
上面有了画布和节点数据,只是有了一个雏形,但是还没有任何的图形化效果。我们加入一些效果试试
在gojs里面给我们提供了几种模型节点的可选项,官方文档:
- Shape:形状——Rectangle(矩形)、RoundedRectangle(圆角矩形),Ellipse(椭圆形),Triangle(三角形),Diamond(菱形),Circle(圆形)等
- TextBlock:文本域(可编辑)
- Picture:图片
- Panel:容器来保存其他Node的集合
默认的节点模型代码只是由一个TextBlock组件构建成
GoJS 去水印
使用GoJS默认会在画布的左上角生成水印
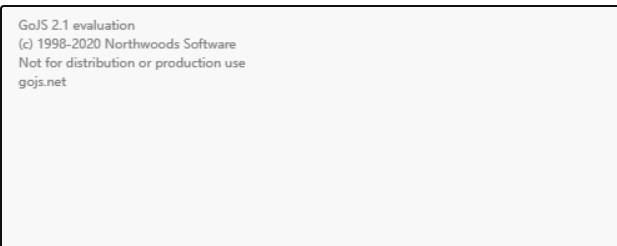
搜索去除水印的相关方法说,之前的版本中GoJS去除水印很简单,在release/go.js文件中搜索带7eba17a4ca3b1a8346的函数,让其返回true就可。
我使用的版本是2.3.14,按照上述方法尝试,并未修改成功。
查找发现,GoJS在初始创建canvas的时候会进行绘制水印。在初始化使用绘制函数创建画布的时候,加上了水印。
查找新版和旧版的去水印功能,发现只要调用获取水印的函数就没问题,把绘制的函数替换为获取水印的函数
- 去水印脚本如下:
const fs = require('fs');
const path = require('path');
const file = path.join(__dirname, './node_modules/gojs/release/go.js');
// 我用到了GoJS 的扩展,所以要把 go-module.js 文件也加上
const file1 = path.join(__dirname, './node_modules/gojs/release/go-module.js');
//去除gojs水印
const ignore = function (file) {
    fs.readFile(file, 'utf8', function (err, data) {
        if (err) throw err;
        let hasMatch = false;
        let content = data.replace(/[\w\W]{8}7eba17a4ca3b1a8346[\w\W]{31}/gi, function (match) {
            if (match) hasMatch = true;
            return 'function(){return true;}';
        }); //旧版去水印
        if (!hasMatch) {
            //新版去水印
            content = data.replace(/[^\)^\{}]*7ca11abfd7330390[^;]*/gi, function (match) {
                //查找绘制文本的语句
                let arr = /\]\(([^\,]+)/.exec(match); //查找语句中的获取水印文本函数
                //console.log(arr);
                return arr && arr.length >= 1 && arr[1]; //用该函数整个替换绘制函数
            });
        }
        fs.writeFile(file, content, 'utf8', (err) => {
            if (err) throw err;
            // console.log('success done');
        });
    });
};
ignore(file);
// ignore(file1);
};
ignore(file);
ignore(file1);

// 然后这个脚本在package.json打包或者运行时插入命令调用
// 这里的脚本文件名为 ignoreGoJS.js
"scripts": {
        "dev": "node ignoreGoJS && vue-cli-service serve",
        "build": "node ignoreGoJS && vue-cli-service build",
    },
// 或者直接执行 js 文件

$ node ignoreGoJS
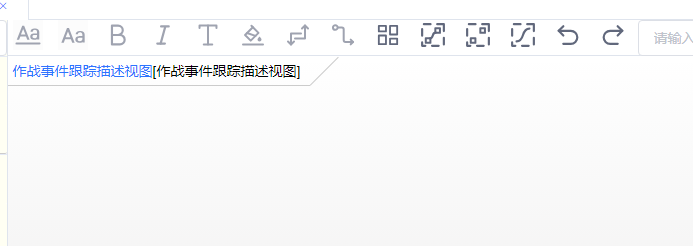
运行查看效果,没有水印了:
GoJS 画布常用API
画布操作
| 作用 | api |
|---|---|
| 获取当前画布的 json | myDiagram.model.toJson() |
| 加载 json 刷新画布 | myDiagram.model = go.Model.fromJson(model) |
| 删除选中节点或线 | myDiagram.commandHandlr.deleteSelection() |
| 获取选中的节点或线 myDiagram.selection | - 用例获取选中的节点或线 var nodeOrLinkList = myDiagram.selection nodeOrLinkList.each((node) => { console.info(node.data) }) - 获取第一个选中的节点或线 var nodeOrLinkFirst = myDiagram.selection.first() |
| 获取画布所有节点对象 myDiagram.nodes | var nodes = myDiagram.nodes // 遍历输出节点对象 nodes.each((node) => { console.info(node.data.text) }) |
获取并操作选中元素也可以在监听选中项进行修改:
// 监听选中项
      that.myDiagram.addDiagramListener("ChangedSelection", function (e, i) {
        // console.log("重新选择了", e.myDiagram.lastInput.viewPoint);
        // console.log("重新选择了", e.Lr.ea);
        that.selectNode = [];
        that.selectLink = [];
        that.myDiagram.selection.each(function (part) {
          if (part instanceof go.Node) {、
            /* 获取所有的 Node 节点 */
            that.selectNode.push(part.data);
          } else if (part instanceof go.Link) {
            /* 获取所有的 link 连线  */
            that.selectLink.push(part.data);
          }
        });
      });
节点操作
| 作用 | API |
|---|---|
| 添加节点 | myDiagram.model.addNodeData(node) |
| 删除节点 | myDiagram.model.removeNodeData(node) |
| 选中单个节点(不能批量选中) | myDiagram.select(node) |
| 更改节点属性 | myDiagram.model.setDataProperty(node, "color",'#000") (参数对应:要修改的节点、要修改的属性名、修改后的属性值) |
| 根据节点数据对象更改节点属性 myDiagram.model. updateTargetBindings (node) | var node = myDiagram.model. findNodeDataForKey('nodeKey') node.text = 'newText' node.color = 'pink' myDiagram.model.updateTargetBindings(node) |
| 获取节点对象 | let node = myDiagram.findNodeForKey('key') |
| 获取节点Data | let nodeData = myDiagram.model. findNodeDataForKey(‘key') |
| 批量删除节点 myDiagram.model. removeNodeDataCollection (nodes) | let removeNodes = let removeNode0 = myDiagram.model. findNodeDataForKey('key0') let removeNode1 = myDiagram.model. findNodeDataForKey('key1') removeNodes.push(removeNode0) removeNodes.push(removeNode0) myDiagram.model.removeNodeDataCollection(removeNodes) |
- 批量删除节点
let removeNodes = [] let removeNode0 = myDiagram.model.findNodeDataForKey('key0') let removeNode1 = myDiagram.model.findNodeDataForKey('key1') removeNodes.push(removeNode0) removeNodes.push(removeNode0) myDiagram.model.removeNodeDataCollection(removeNodes) - 模糊获取节点 (版本 1.68 以上):
myDiagram.findNodesByExample(data)
/*
匹配方式默认为===运算符进行比较。
/abc/ 匹配包含“abc”的任何字符串
/abc/i 匹配包含“abc”的任何字符串,忽略大小写
/^no/i 匹配任何以“no”开头的字符串,忽略大小写
/ism$/匹配任何以“ism”结尾的字符串
/(green|red) apple/ 匹配包含“green apple”或“red apple”的字符串
要查询的值类型区分数字和字符串:比如json中是`90`,写成 90 会查询
*/
let data = {};
   data.text="设计";
// data.text=/设计/;
// data.text=/设计/i;
// data.text=/^设计/;
// data.text=/设计$/;
// data.text=/(勘|察)设计/;
let nodes = myDiagram.findNodesByExample(data);
nodes.iterator.each(function (node) {
    console.log(node.data);
});
线
- 添加线:
myDiagram.model.addLinkData(linkData) - 删除线:
myDiagram.model.removeLinkData(linkData) - 批量删除线:
{ Array | iterator } removeLinks removeLinkDataCollection(removeLinks) / * 实现 */ let removeLinks = [] // 拿到节点对象 let node = myDiagram.findNodeForKey("key") // 获取节点所有线 node.findLinksConnected().each((link) => { removeLinks.push(link.data) }) myDiagram.model.removeLinkDataCollection(removeLinks) - 模糊获取线 (1.68版本以上):
myDiagram.findLinksByExample(data) // 匹配方式和模糊获取节点的规则一致 /* 实现 */ // 值区分数值和字符串,‘2.18’ 和 2.18 不同 let links = myDiagram.findLinksByExample({from:'1',to:'2'}) links.iterator.each((link) => { console.info(link.data) }) - 更改属性值:
myDiagram.model.setDataProperty(linkData, 'color', 'green') - 获取节点的线:
{string | null =} PID 端口ID findLinksConnected(PID) /* 实现 */ let node = myDiagram.findNodeForKey('key') node.findLinksConnected().each((link) => { console.info(link.data) }) - 获取进入节点的线:
{string | null =} PID 端口ID findLinksInto(PID) /* 实现 */ let node = myDiagram.findNodeForKey('key') node.findLinksInto().each((link) => { console.info(link.data) }) - 获取从节点出来的线:
{string | null =} PID 端口ID findLinksOutOf(PID) /* 实现 */ let node = myDiagram.findNodeForKey('key') node.findLinksOutOf().each((link) => { console.info(link.data) }) - 获取两个节点之间的线
{node } othernode B节点对象
{string | null =} PID 端口ID
{string | null =} otherPID B节点端口ID
findLinksTo(othernode, PID, otherPID)
/* 实现 */
let node0 = myDiagram.findNodeForKey('key0')
let node1 = myDiagram.findNodeForKey('key1')
node0.findLinksTo(nodeB).each((link) => {
    console.info(link.data)
})
树节点
- 找节点的所有父祖节点,包括该节点
node.findTreeParentChain() /* 实现 */ node.findTreeParentChain().each((pNode) => { console.info(pNode.data) }) - 找节点的所有子孙节点,包括该节点
node.findTreeParts() /* 实现 */ node.findTreeParts().each((sNode) => { console.info(sNode.data) }) - 找节点的父
node.findTreeParentNode() /* 实现 */ let parentNode = node.findTreeParentNode() - 找节点的子
node.findTreeChildrenNodes()
/* 实现 */
node.findTreeChildrenNodes().each((childNode) => {
    console.info(childNode.data)
})
画布常用增删改查API
- 添加画布元素
// 添加节点 addNodeData(NodeData) // 添加连线 addLinkData(LinkData) /* 实现 */ // 添加节点 let node = { key: id, id: id, color: "#fff", name: name, color2: "#000", text: type, loc:location, /* bold、italic、fontsize、fontFamily、font 是我设置的存储字体属性 */ bold: "normal", italic: "normal", fontsize: 12, fontFamily: "Segoe UI,sans-serif", font: { bold: "normal", italic: "normal", fontSize: 12, fontFamily: "Segoe UI,sans-serif", }, }; this.diagram.model.addNodeData(node); // 添加连线 let link = { from: from, to: to, text: "text", id:id, key:key }; this.diagram.model.addLinkData(link); - 删除画布元素
// 删除节点 removeNodeData(nodeData) // 删除连线 removeLinkData(linkData) /* 实现 */ // 通过节点的 key 拿到节点对象并删除 let node = this.diagram.model.findNodeDataForKey(this.nodeFrom.key); this.diagram.model.removeNodeData(node); // 通过事件获取到要删除的连线 id,查找并删除 this.association.forEach((item) => { /* this.association 是我当前画布的所有连线对象 */ if (item.id === this.checkId) { /* 查找要删除的连线 */ this.diagram.model.removeLinkData(item); } }); // 也可以通过获取画布选中对象进行删除, 初始化 GoJS的时候绑定选中项监听 // 监听选中项 let that = this this.diagram.addDiagramListener("ChangedSelection", function (e, i) { console.log("重新选择了", e); that.selectNode = []; that.selectLink = []; that.diagram.selection.each(function (part) { if (part instanceof go.Node) { that.selectNode.push(part.data); /* 获取当前选中节点 */ } else if (part instanceof go.Link) { that.selectLink.push(part.data); /* 获取当前选中连线 */ } }); }) // 然后可以对选中执行要执行的操作 - 更新画布元素
setDataProperty(data,propName,val) // 参数: // data:NodeData或LinkData对象 // propName:要更新的属性名 // val:要更新的属性值 /* 实现 */ // 拿到节点 const nodeData = myDiagram.model.findNodeDataForKey('key') // 对元素对象的属性更改的时候,如果没有该属性则添加这个属性 myDiagram.model.setDataProperty(nodeData, 'text', '2333') - 查询画布元素
// 通过 key 获取节点
findNodeDataForKey('key')
// 通过 linkData 模糊查询匹配线集合
findLinksByExample(linkData)

/* 实现 */
const nodeData = myDiagram.model.findNodeDataForKey('key')

// 根据 linkData,模糊匹配线集合,linkData 可以为线的部分属性
let linkData = {
    from:'1',
    to:2
}
const links = myDiagram.model.findLinksByExample(linkData)
// 遍历输出所有线的数据对象
while(links.next()){
    console.info(links.value.data)
}
addDiagramListener
GoJS的addDiagramListener函数可以监听画布的事件属性:myDiagram.addDiagramListener("ObjectContextClicked",function (e, i) { console.log("e:", e); });- 用户交互事件
- ObjectSingleClicked:图形对象(如节点或连线)被单击时触发。
- ObjectDoubleClicked:图形对象被双击时触发。
- ObjectContextClicked:图形对象被右键点击时触发。
- BackgroundSingleClicked:图表背景被单击时触发。
- BackgroundDoubleClicked:图表背景被双击时触发。
- BackgroundContextClicked:图表背景被右键点击时触发。
- 用户交互事件
- 选择事件
- ChangingSelection:选择集合即将改变之前触发。
- ChangedSelection:选择集合已经改变之后触发。
- 剪切板事件
- ClipboardChanged:零部件已被复制到剪贴板上时触发。
- ClipboardPasted:零部件已从剪贴板粘贴到图表中时触发。
- 布局和动画事件
- AnimationStarting:图表动画开始之前触发。
- AnimationFinished:图表动画完成之后触发。
- InitialLayoutCompleted:图表初始化布局完成后触发。
- LayoutCompleted:图表布局完成后触发。
- 图表状态变化事件
- DocumentBoundsChanged:图表中各零部件的面积或边界发生变化时触发。
- ViewportBoundsChanged:图表的视图范围(即用户当前可见的区域)发生变化时触发。
- 特定操作事件
- LinkDrawn:用户通过LinkingTool创建新链接时触发。
- LinkRelinked:用户通过RelinkingTool或DraggingTool重新连接现有链接时触发。
- LinkReshaped:用户通过LinkReshapingTool调整链接路径时触发。
- SelectionCopied:选中的图表元素被复制时触发。
- SelectionMoved:选中的图表元素被移动时触发。
- SelectionDeleting:选中的图表元素即将被删除时触发。
- SelectionDeleted:选中的图表元素已被删除后触发。
- 其他事件
- GainedFocus:图表获得键盘焦点时触发。
- LostFocus:图表失去键盘焦点时触发。
- Modified:图表的修改状态发生变化时触发(例如,当用户更改了图表的内容但尚未保存时)。
GoJS 元素自动居中
GoJS 在默认情况下不会自动居中对齐,要在浏览器窗口大小改变时,自动将 GoJS 画布内元素居中对齐
contentAlignmentDiagram中可以设置contentAlignment内容对齐,但这个设置会在画布元素拖拽之后自动布局,导致元素无法被拖动initialContentAlignment是在初始化时居中对齐,对于缩放之后不会再次生效
alignDocumentalignDocument方法可以手动设置对齐方式,但缩放几次之后还是会出现无法对齐的情况
解决思路:
在onresize事件中,先将contentAlignment设置为Center,再调用alignDocument方法将元素在document和viewport中都居中,然后再将contentAlignment改为default
let that = this
window.addEventListener('resize',() =>{
  that.diagram.contentAlignment = go.Spot.Center
  that.diagram.alignDocument(go.Spot.Center, go.Spot.Center)
  that.diagram.contentAlignment = go.Spot.Default
})